Unity’s own documentation: https://docs.unity3d.com/560/Documentation/Manual/UnityManual.html
Video Walkthrough of Getting Started with Unity: https://drive.google.com/open?id=1aCgd3wwSfjUXAe3cIkA5wWcSWBIWWA_q
Downloading and installing Unity Hub and Unity:
“The Unity Hub is a standalone application that streamlines the way you find, download, and manage your Unity Projects and installations. In addition, you can manually add versions of the Editor that you have already installed on your machine to your Hub.”
“To install and use the Unity Editor, you must have a Unity Developer Network (UDN) account. If you do not have an account, follow the prompts to create one. You can choose to create a Unity ID, or use one of the social sign-ins.” (The Personal version of Unity is free and includes most features.)
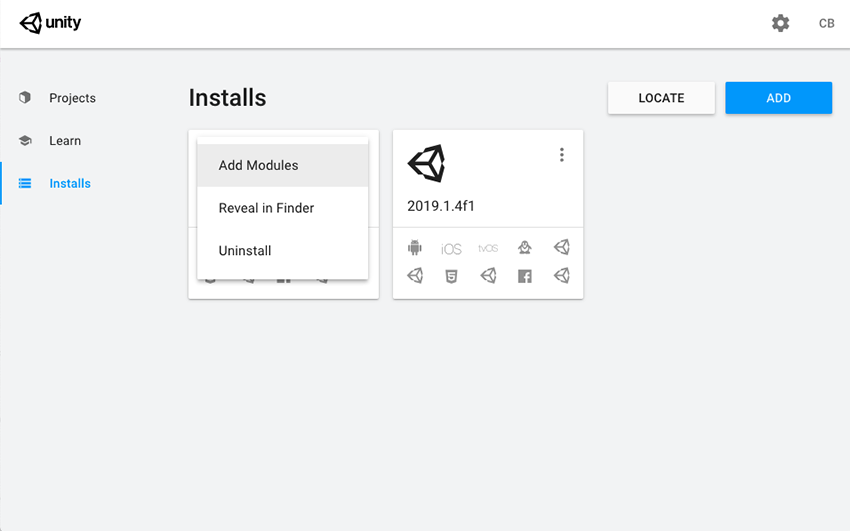
Versions of Unity installed are listed in the Installs tab of Unity Hub.
Consider Unity Collaborate for students working in pairs or on teams: https://docs.unity3d.com/Manual/UnityCollaborate.html
* Note: Unity projects do not get stored as specific files. Rather the whole folder labeled with your project name stores your project, so you have to click on that when opening an existing project in your files.
* Note: Make sure you have “3D” (instead of “2D”) selected when creating a new project for VR.
“The Learn tab in the Home window gives you access to a variety of tutorials and learning resources (including example Projects that you can import directly into Unity) to help you get started with Unity.
Find additional learning resources on the Unity website: https://unity.com/learn

Learn tab in the Unity Hub.
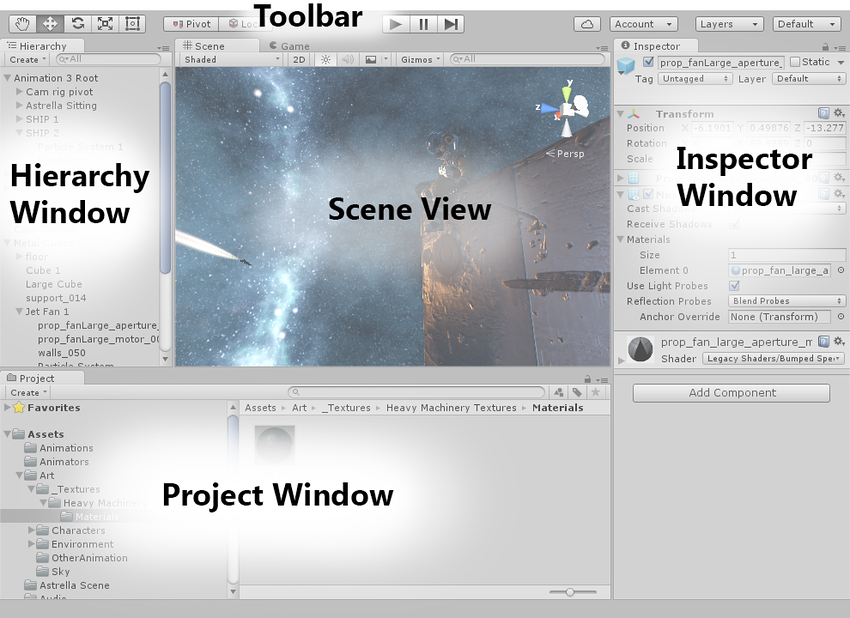
Learning the interface (various tabbed windows that can be arranged into a custom layout, which make up the Unity Editor): https://docs.unity3d.com/Manual/LearningtheInterface.html
The main windows: Project window, Scene view, Game view, Hierarchy window, Inspector window, Toolbar, Console (for debugging and error messages).
Other windows can be opened from the Windows tab in the menu bar: Animation window, Lighting window, Asset Store, etc.
Scene view navigation: Keyboard shortcuts for moving around quickly and efficiently.
Orbit: hold Alt+left-click, then drag
Move: hold Alt+Control+left-click, then drag
Zoom: hold Alt+right-click, then drag
Scenes: "contain the environments and menus of your game. Think of each unique Scene file as a unique level. In each Scene, you place your environments, obstacles, and decorations, essentially designing and building your game in pieces.
When you create a new Unity project, your scene view displays a new Scene. This Scene is untitled and unsaved. The Scene is empty except for a Camera (called Main Camera) and a Light (called Directional Light).
To save the Scene you’re currently working on, choose File > Save Scene from the menu, or press Ctrl + S (Windows) or Cmd + S (masOS).
Unity saves Scenes as Assets in your project’s Assets folder. This means they appear in the Project window, with the rest of your Assets.
To open a Scene in Unity, double-click the Scene Asset in the Project window. You must open a Scene in Unity to work on it."
Play/Pause/Step Buttons (used with the Game View): "Use the buttons in the Toolbar to control the Editor Play Mode and see how your published game plays. While in Play Mode, any changes you make are temporary, and will be reset when you exit Play Mode. The Editor UI darkens to remind you of this."

Play/pause/step buttons, located at the top center of the Editor.